Spring Boot - A quickstart
We will start with Introduction to Spring Boot then we will create a sample project and add dependencies, will discuss about @EnableAutoConfiguration, write a controller, run the application and end with creating a jar file for spring boot application.
1. What is Spring Boot?
Spring Boot helps in creating stand-alone, production-grade application easily with minimum fuss. It is the opinionated view of Spring framework and other third party libraries which believes in convenient configuration based setup.
Let's start building Spring Boot Application.
2. Adding dependencies in pom.xml
We will first add spring-boot-starter-parent as parent of our maven based project.
<parent>
  <groupId>org.springframework.boot</groupId>
  <artifactId>spring-boot-starter-parent</artifactId>
  <version>1.5.1.RELEASE</version>
</parent>
The benefit of adding spring-boot-starter-parent is that version managing of dependency is easy. You can omit the required version on the dependency. It will pick the one configured the parent pom or from starters pom. Also, it conveniently setup the build related configurations as well.
2.1. Adding spring-boot-starter-web dependency
This will configure/ add all the required dependencies for spring-web module.
<dependency>
  <groupId>org.springframework.boot</groupId>
  <artifactId>spring-boot-starter-web</artifactId>
</dependency>
3. Creating App class
We will create a App class with main(String[] args) method. In the main() of App class, we have delegated the call to run() method of SpringApplication. SpringApplication will bootstrap and auto-configure our application and in our case will start the embedded tomcat server. In run method, we have passed App.class as argument which tells Spring that this is our primary spring component (helps in bootstrapping).
@SpringBootApplication
public class App {
  public static void main(String[] args) {
    SpringApplication.run(App.class, args);
  }
}
@SpringBootApplication indicates that class is configuration class and also trigger the auto-configure through @EnableAutoConfiguration and component scanning through @ComponentScan annotation in it.
3.1. What is @EnableAutoConfiguration?
It enables the auto-configuration of Spring Application Context. It attempts to configuration your application as per the classpath dependencies that you have added.
3.2. Creating a controller
We will create a controller HelloGbController. We have used two annotations @RestController and @GetMapping. You can read more on new annotation introduced by Spring here.
@RestController signifies that this class is web @Controller and spring will consider it to handle incoming web requests.
@RestController
public class HelloGbController {
@GetMapping
public String helloGb() {
return "Gaurav Bytes says, \"Hello There!!!\"";
}
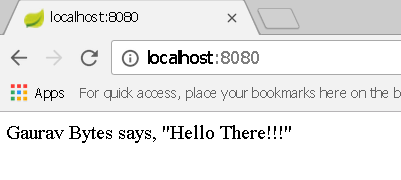
}4. Running the application
You can use maven command mvn spring-boot:run to run it as Spring Boot application and when you hit the localhost:8080 on your web browser, you will see the below web page.
5. Creating a jar for spring boot application
You need to add spring-boot-maven-plugin plugin to your build configuration in pom.xml and then you can create a jar with maven command mvn repackage and simply run it as jar with command java -jar spring-boot-quickstart-0.0.1-SNAPSHOT.jar.
<plugin>
  <groupId>org.springframework.boot</groupId>
  <artifactId>spring-boot-maven-plugin</artifactId>
</plugin>
This is how you can build a simple spring boot application. I hope you find this post helpful. You can download the example code from Github.
Tags: Spring Framework, Spring Boot, Spring Boot quickstart
← Back home